So, listen up, friends! If you're diving into the world of woodworking or just trying to refine your skills, you NEED to know about fillers woodworking. Whether you're working on a sleek dining table or an intricate cabinet, fillers are your secret weapon to achieving that flawless finish. They’re like the glue that holds everything together—literally and figuratively. Now, let’s get real here: a lot of people skip this step, thinking it’s unnecessary. But trust me, understanding how to use fillers properly can take your woodworking game to the next level.
Let’s break it down. Fillers in woodworking are materials used to fill gaps, cracks, and imperfections in wood. They’re like the magic dust that makes rough edges smooth and uneven surfaces perfect. Whether you’re dealing with natural wood or engineered materials, fillers are your best friend. They not only enhance the aesthetics of your project but also add durability and strength. So, if you're serious about woodworking, this is one skill you don’t want to miss out on.
Now, before we dive deep into the nitty-gritty, let’s get one thing straight: there’s a lot of misinformation floating around about fillers woodworking. Some people think it’s just slapping on some glue and calling it a day. WRONG! This guide is here to set the record straight and give you all the insider tips you need to become a pro at using fillers. Ready to level up? Let’s go!
Read also:Kylie Rubin The Rising Star You Need To Know About
Table of Contents
- What Are Fillers in Woodworking?
- Types of Fillers for Woodworking
- How to Choose the Right Filler
- Tools You Need for Fillers Woodworking
- Preparing Your Wood Surface
- The Application Process
- Common Mistakes to Avoid
- Pro Tips for Perfect Results
- Fillers and Sustainability
- Conclusion: Why Fillers Are Essential
What Are Fillers in Woodworking?
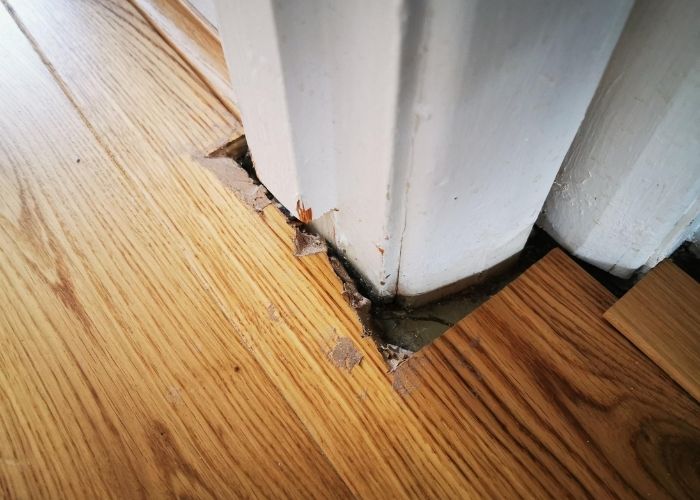
Alright, let’s get to the basics. Fillers in woodworking are materials designed to fill gaps, holes, and cracks in wood. Think of them as the ultimate problem solvers. Whether you’re working with hardwood, softwood, or even engineered wood, imperfections are bound to happen. And that’s where fillers come in. They smooth out those rough patches and give your project that professional finish.
Here’s the deal: wood is a natural material, and it’s not always perfect. Even the best pieces can have knots, cracks, or uneven surfaces. Fillers help you deal with these issues without compromising the integrity of the wood. Plus, they’re super versatile. You can use them on everything from furniture to flooring to decorative pieces. So, if you’re looking to make your woodworking projects stand out, fillers are your go-to solution.
Why Use Fillers in Woodworking?
Let me tell you why fillers are a game-changer. First off, they improve the appearance of your work. Nobody wants to look at a table with visible gaps or a cabinet with uneven edges. Fillers smooth out those imperfections, giving your project that polished look. Second, they add structural integrity. By filling in gaps and cracks, you’re reinforcing the wood, making it stronger and more durable.
And here’s the best part: fillers are easy to use. You don’t need to be a master carpenter to get the hang of them. With a little practice, you’ll be filling like a pro in no time. So, whether you’re a beginner or a seasoned woodworker, fillers are a must-have in your toolkit.
Types of Fillers for Woodworking
Now that you know what fillers are, let’s talk about the different types. Not all fillers are created equal, and choosing the right one can make all the difference in your project. Here’s a quick rundown of the most common types:
- Wood Putty: This is a popular choice for small repairs. It’s easy to apply and dries quickly, making it perfect for minor imperfections.
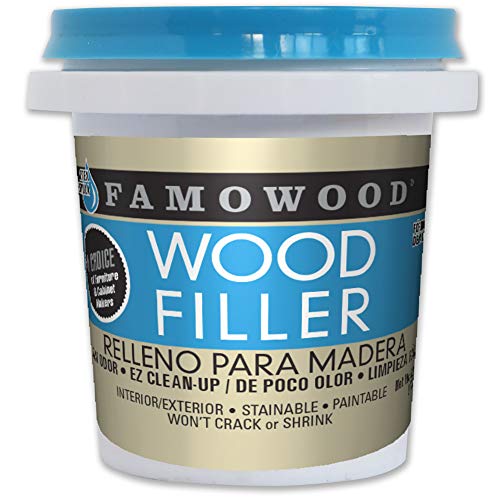
- Wood Filler: A bit thicker than putty, wood filler is ideal for larger gaps and holes. It’s also great for structural repairs.
- Epoxy Fillers: These are the heavy-duty options. Epoxy fillers are super strong and can handle serious damage. They’re also waterproof, making them perfect for outdoor projects.
- Caulk: While not traditionally a filler, caulk can be used to seal gaps and cracks. It’s flexible and works well in areas that need some give.
Each type has its own strengths and weaknesses, so it’s important to choose the right one for your specific needs. For example, if you’re working on a piece that will be exposed to moisture, you’ll want to go with an epoxy filler. But if you’re just filling in some small dents, wood putty might do the trick.
Read also:Miss London The Crown Jewel Of The City That Never Sleeps
Which Filler Should You Use?
Here’s a little secret: the type of filler you choose depends on the project you’re working on. Are you repairing a chair leg? Go for wood filler. Building a deck? Epoxy’s your best bet. The key is to match the filler to the job. Don’t be afraid to experiment a little to find what works best for you.
How to Choose the Right Filler
Picking the right filler can be overwhelming, especially if you’re new to woodworking. But don’t worry, I’ve got you covered. Here are a few things to consider when choosing a filler:
- Material Compatibility: Make sure the filler you choose works well with the type of wood you’re using. Some fillers are better suited for certain woods than others.
- Project Requirements: Think about what your project needs. Is it structural? Aesthetic? Both? Your answer will guide your filler choice.
- Drying Time: Some fillers dry faster than others. If you’re working on a tight schedule, this could be a crucial factor.
- Cost: Let’s face it, budget matters. Some fillers are more expensive than others, so make sure you’re getting the best value for your money.
Remember, there’s no one-size-fits-all solution when it comes to fillers. The key is to weigh your options and choose the one that best meets your project’s needs.
Factors to Consider
Here’s a quick tip: always read the label. Most fillers come with detailed instructions on how to use them and what they’re best suited for. Don’t skip this step—it could save you a lot of headaches down the line. Also, don’t be afraid to ask for advice. Whether it’s from a fellow woodworker or a store clerk, getting a second opinion can be invaluable.
Tools You Need for Fillers Woodworking
Alright, let’s talk tools. You don’t need a whole workshop to work with fillers, but there are a few essentials that can make your life easier:
- Putty Knife: This is your go-to tool for applying fillers. A good putty knife will help you get into those hard-to-reach spots.
- Sandpaper: Once the filler dries, you’ll need to sand it down to smooth it out. Start with a coarse grit and work your way up to a finer one for that perfect finish.
- Rags: Keep a few rags handy for wiping away excess filler and cleaning up any mess.
- Gloves: Some fillers can be harsh on your skin, so it’s always a good idea to wear gloves when working with them.
These tools might seem simple, but they’re crucial for getting the job done right. Don’t skimp on quality here—investing in good tools will pay off in the long run.
Why Quality Tools Matter
Let me tell you a story. A few years back, I tried to save a buck by using a cheap putty knife. Big mistake. The blade bent halfway through the project, and I ended up with a lopsided repair. Moral of the story: quality matters. Spend a little extra on your tools, and you’ll save yourself a lot of frustration.
Preparing Your Wood Surface
Before you start applying fillers, you need to prep your wood. This step is crucial for getting the best results. Here’s how to do it:
- Clean the Surface: Use a damp cloth to wipe away any dust or debris. You want a clean slate to work with.
- Sand the Area: Lightly sand the area where you’ll be applying the filler. This helps the filler adhere better and ensures a smooth finish.
- Mask Off: If you’re working near areas you don’t want to get filler on, use masking tape to protect them.
Taking the time to prep your wood properly can make a huge difference in the final result. Don’t rush this step—it’s worth the extra effort.
Tips for Surface Preparation
Here’s a pro tip: always test your filler on a scrap piece of wood first. This will give you a chance to see how it reacts with the wood and make any necessary adjustments. Also, don’t forget to let the wood dry completely before applying the filler. Moisture can interfere with the bonding process and lead to a poor finish.
The Application Process
Now that you’ve prepped your wood, it’s time to apply the filler. Here’s a step-by-step guide:
- Mix the Filler: If you’re using a two-part filler, mix it according to the instructions on the package. This is usually a 1:1 ratio, but always double-check.
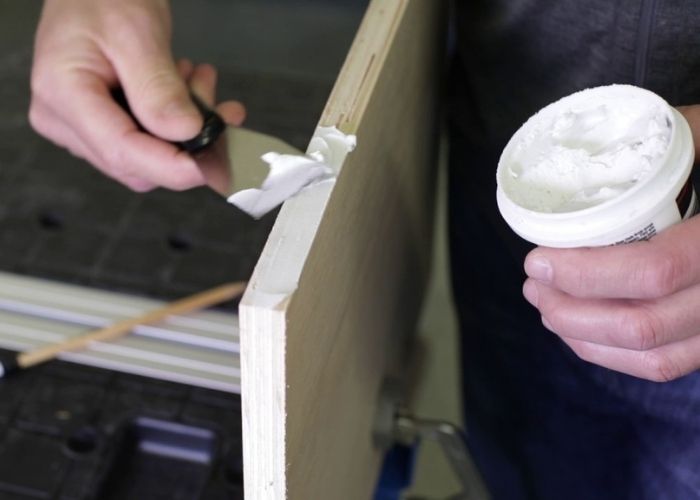
- Apply the Filler: Use your putty knife to apply the filler to the area you’re repairing. Make sure to press it firmly into any gaps or cracks.
- Smooth It Out: Once the filler is applied, use the putty knife to smooth it out. Try to get it as level as possible with the surrounding wood.
- Let It Dry: Follow the drying instructions on the package. Some fillers dry in a matter of minutes, while others can take hours.
- Sand It Down: Once the filler is dry, use sandpaper to smooth it out. Start with a coarse grit and work your way up to a finer one for that perfect finish.
And there you have it! With these steps, you’ll have a seamless repair in no time.
Common Issues During Application
Here’s something to watch out for: overfilling. It’s tempting to pile on the filler, but too much can lead to a lumpy finish. Apply it in thin layers and build up as needed. Also, be careful not to sand too aggressively—you don’t want to damage the surrounding wood.
Common Mistakes to Avoid
Even the best woodworkers make mistakes, but some are easier to avoid than others. Here are a few common ones to watch out for:
- Skipping the Prep: Like I mentioned earlier, prepping your wood is crucial. Skipping this step can lead to poor adhesion and a subpar finish.
- Using the Wrong Filler: Make sure you’re using the right filler for your project. Using the wrong one can lead to all sorts of issues, from cracking to discoloration.
- Rushing the Drying Process: Let the filler dry completely before sanding or painting. Rushing this step can ruin your hard work.
By avoiding these common mistakes, you’ll be well on your way to mastering fillers woodworking.
How to Fix Mistakes
Let’s say you’ve made a mistake. Don’t panic! Most filler mistakes can be fixed. If you’ve applied